|
công cụ tìm kiếm bảng dữ liệu linh kiện điện tử |
|
|
công cụ tìm kiếm bảng dữ liệu linh kiện điện tử |
|
TNC-R2-CF bảng dữ liệu(PDF) 10 Page - DDK Ltd. |
|
|
|||||||||||||||||||||||||||||
TNC-R2-CF bảng dữ liệu(HTML) 10 Page - DDK Ltd. |
|
|
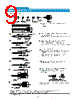
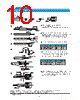
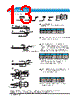
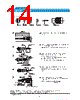
10 / 15 page  Unit:mm http://www.ddknet.co.jp TNC Series ◎ Please acknowledge that the specification etc. of this catalog might change by the improvement etc. without notice. Moreover, the characteristic and the specification of the published product are the reference values. Please confirm the content with the latest delivery specifications when you use the product. ○ Assembly Instruction(2) Sleeve 14 Ferule Outer Conductor Outer Conductor Sheath Cable Boot B A Center Conductor Center Conductor Crimp Tool Insulator Crimping Dies No gap Contact Contact crimped Boot Ferule Sleeve Contact Body Body Crimp Tool Body Surface Tool Surface Boot Sleeve 14 Ferule Outer Conductor Outer Conductor Sheath Cable Boot B A Center Conductor Center Conductor Crimp Tool Insulator Crimping Dies No gap Contact Contact crimped Boot Ferule Sleeve Contact Body Body Crimp Tool Body Surface Tool Surface Boot ① Insert the boot into the cable and cut the cable as fig.1. Please be careful to not damage the outer conductor. ① ② ③ ④ ⑤ ② Insert the ferule on the outer conductor and spread the top of the outer conductor. Press-in rhe sleeve between insulator and outer conductor. Cut the extra outer conductor along the sleeve. ③ Cut the insulator and center conductor as fig.3. Part Number A B TNC-P-2.5D2W-CR10-CF 5.0mm 4.0mm TNC-P-3D2W-CR10-CF 5.5mm 3.5mm ④ Pinch the contact in the crimping hole(center hole) and insert the center conductor of the cable. Crimp the contact (match the side hole of contact with the curve of crimping hole of tool.) Part Number Crimp Tool TNC-P-2.5D2W-CR10-CF CR-H-1115 TNC-P-3D2W-CR10-CF CR-H-1135 ⑤ Insert the above contact into the body. Match the key in the insulator and keyway of the contact. Crimp the root of body as fig.5. Cover the boot on the root of the connector body. 10 Parts Configulration |
|
|
Link URL |
| Cho đến nay ALLDATASHEET có giúp ích cho doanh nghiệp của bạn hay không? [ DONATE ] |
Alldatasheet là | Quảng cáo | Liên lạc với chúng tôi | Chính sách bảo mật | Liên kết đến bảng dữ liệu | Trao đổi link | Tìm kiếm theo nhà sản xuất All Rights Reserved©Alldatasheet.com |
| Russian : Alldatasheetru.com | Korean : Alldatasheet.co.kr | Spanish : Alldatasheet.es | French : Alldatasheet.fr | Italian : Alldatasheetit.com Portuguese : Alldatasheetpt.com | Polish : Alldatasheet.pl | Vietnamese : Alldatasheet.vn Indian : Alldatasheet.in | Mexican : Alldatasheet.com.mx | British : Alldatasheet.co.uk | New Zealand : Alldatasheet.co.nz |
|
Family Site : ic2ic.com |
icmetro.com |
 Vietnamese ▼
 English
 Chinese
 German
 Japanese
 Russian
 Korean
 Spanish
 French
 Italian
 Portuguese
 Polish
 Vietnamese
 Indian
 Mexican
 British
 New Zealand